
The positioner helps to place the digital analog inside the 3D printing model. In addition, thanks to its components, it allows for easy insertion so that the analog can be screwed in place.
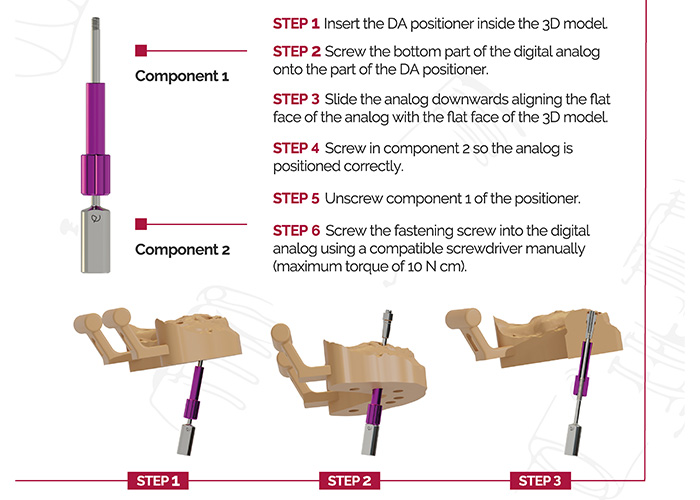
1. Insert the DA positioner inside the 3D printed model.
2. Screw the bottom part of the digital analog onto the part of the DA positioner.
3. Slide the analog downwards aligning the flat face of the analog with the flat face of the 3D printed model.
4. Screw in component 2 so the analog is positioned correctly.
5. Unscrew component 1 of the positioner.
6. Screw the fastening screw into the digital analog using a compatible screwdriver manually (maximum torque of 10 N cm).